





















FAQ GeoDAS Messenger Email Setup SMTP
1. Introduction
- This procedure describes how to set up GeoDAS to send email connecting to an existing SMTP server.
- Sending emails from a Google account (gmail) is not possible through SMTP; please follow the procedure FAQ GeoDAS Messenger Email Setup MAPI instead.
2. Required Tools
- GeoDAS installed on a Windows computer
- Email account for sending emails; check with your email provider for the needed SMTP settings.
3. SMTP Settings in GeoDAS
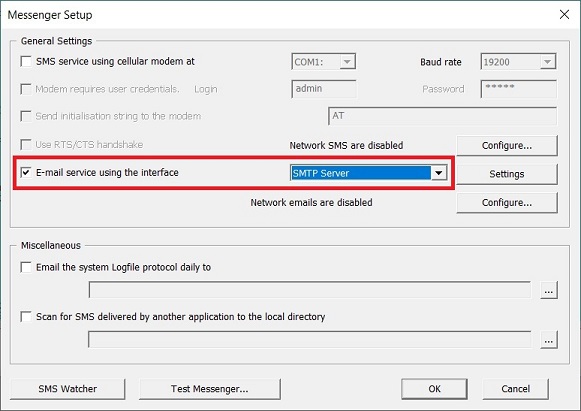
- In GeoDAS under Settings -> Messenger, tick the box E-mail service using the interface and choose SMTP Server from the dropdown.
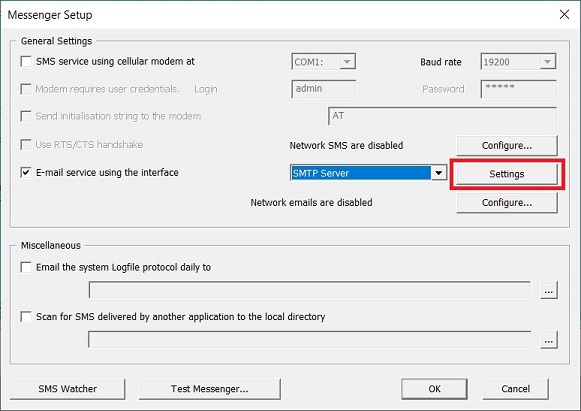
- Click the button [Settings]
- Under Sending name, enter the email address of the sender.
- Under Server name, enter the outgoing mail (SMTP) server address of your email account.
- Under Port, enter the port of your outgoing mail (SMTP) server.
- Under Security, choose the type of security of the outgoing mail server. The port may vary depending on the security selected.
Default port for STARTTLS is 587; default port for SSL/TLS is 465. - Under User name, enter the user name (usually email address) of the sender.
- Under Password, enter the password of the sending email account.
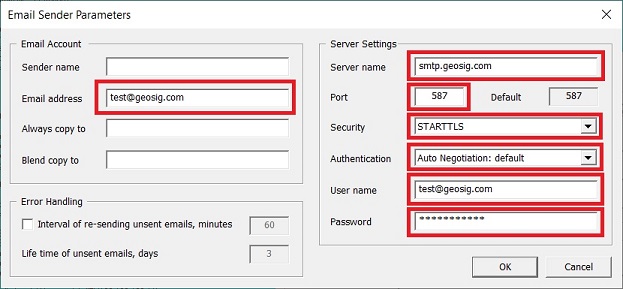
- Close the window with [OK] and restart GeoDAS.
4. Send Test Email from GeoDAS
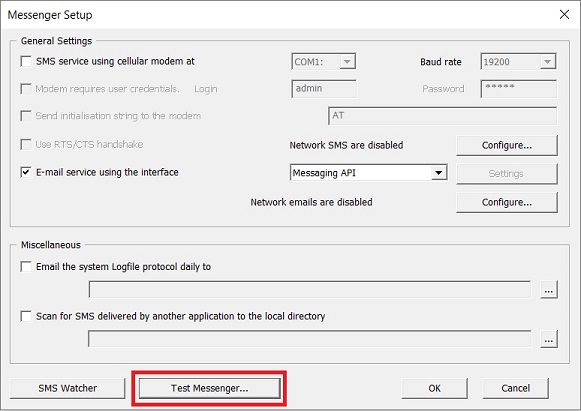
- In GeoDAS under Settings -> Messenger, click the button [Test Messenger...]
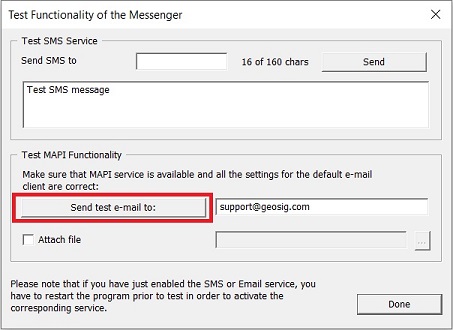
- Enter the email address you want to send the test message to and press the button [Send test e-mail to:] to send the test message.
- If you have get an email with subject Test of the Messenger functionality, the test has passed.
6. Create List of Email Recipients
- The list of recipients is a text file with name and email address of recipients.
- Open a text editor such as Windows Notepad.
- Enter the email recipients; every line of the list must have the following format:
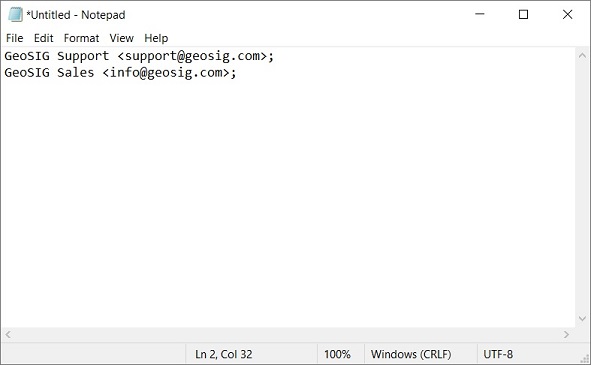
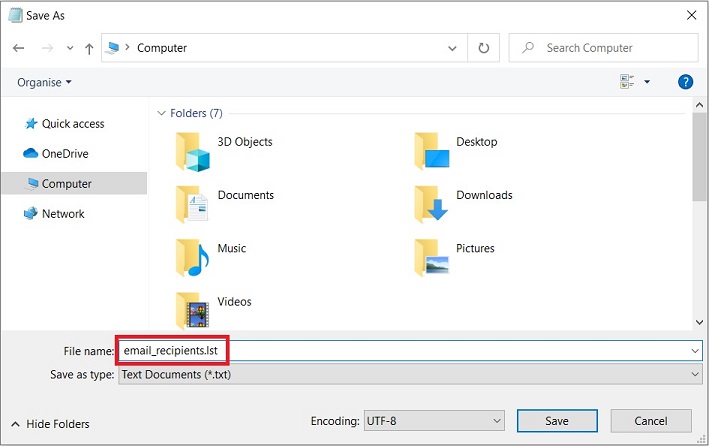
- Save the file with extension .lst (not txt!)
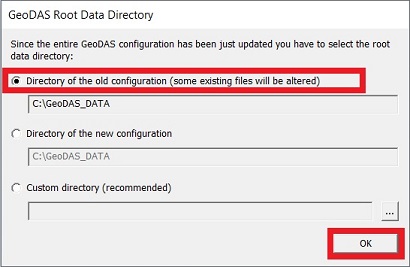
- After the restart, you will be asked to choose the root directory of GeoDAS
- To continue using the same root data directory, tick Directory of the old configuration
- Confirm with [OK]
7. Set up Notifications and Messages in GeoDAS
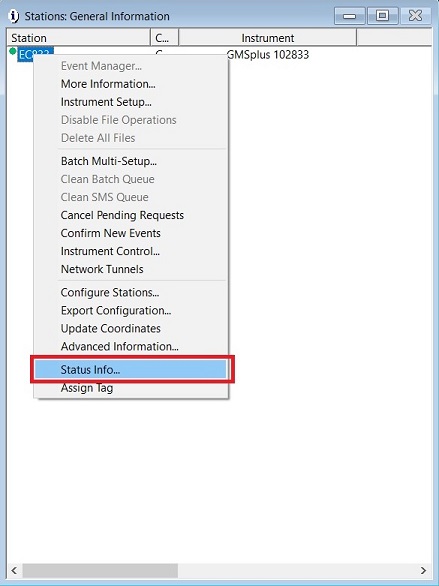
- In GeoDAS window Stations: General Information, right-click on a station and choose Status Info...
- Tick the boxes of the corresponding notification types you want to receive as email.
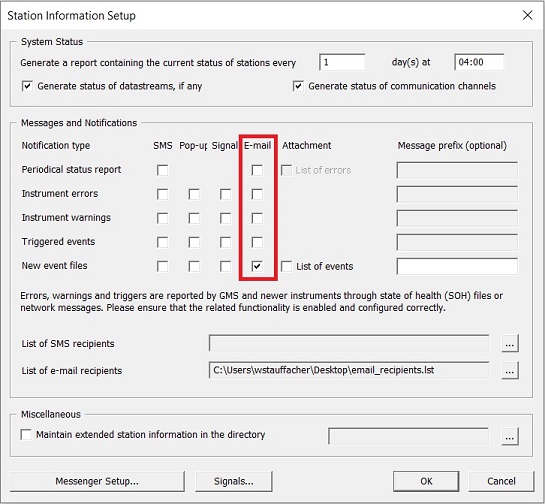
- Click the button [...] to browse the .lst file with the email recipients.
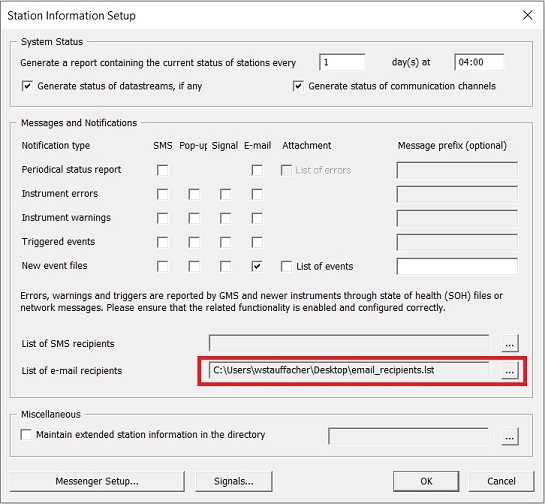
- Close the window with [OK] and restart GeoDAS.